In this tutorial , you’ll explore the communication by talking with Processing and allow the processing to control the servo.
Parts Required
1. Arduino Kit
2. Servo
3. Jumper Wires
Circuits
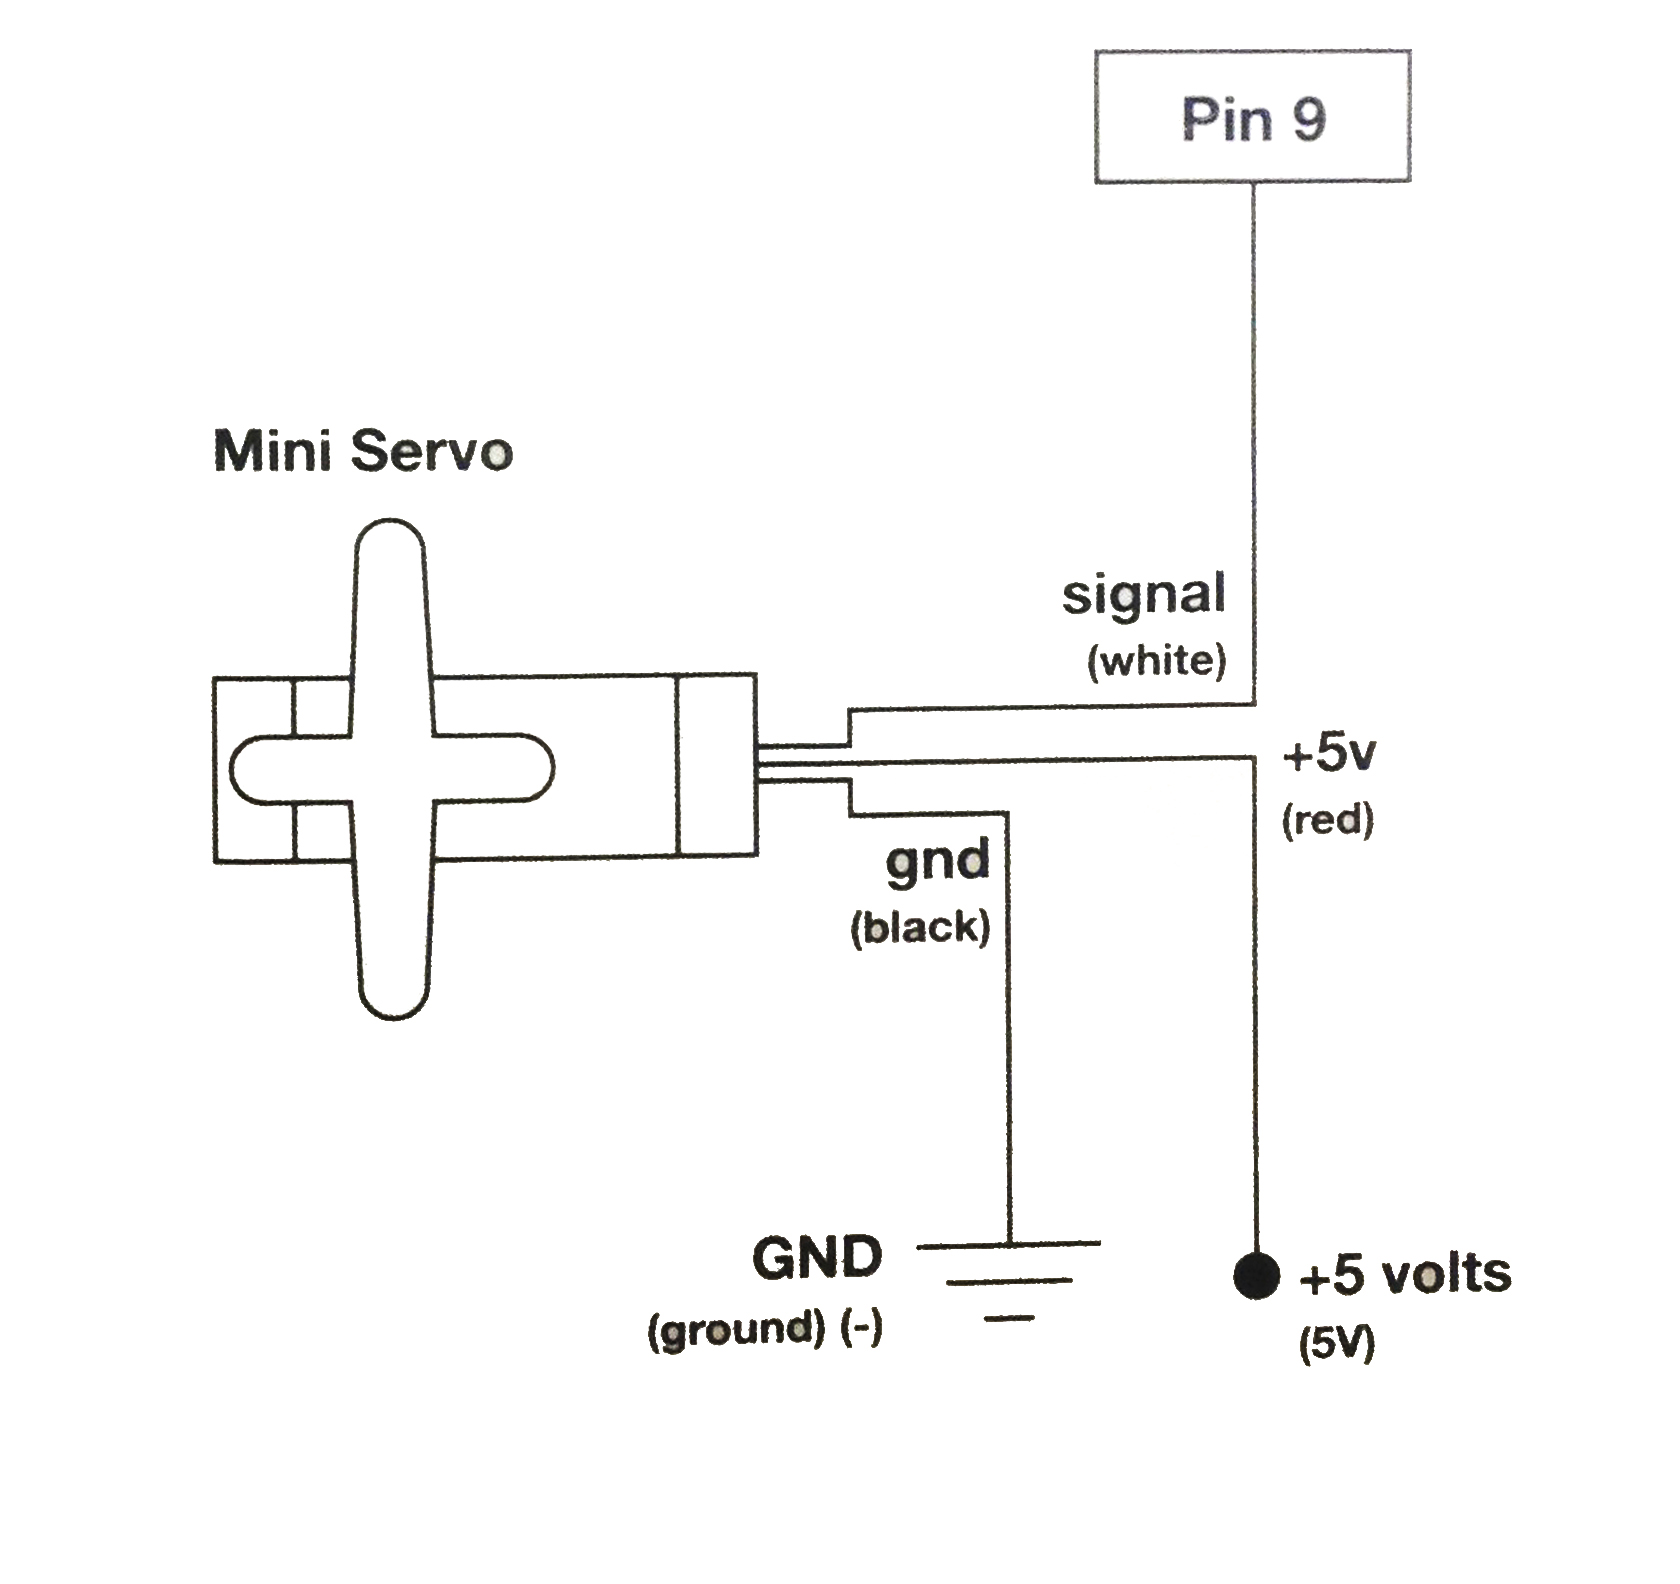
(This circuit is from Vilros Ultimate Starter Kit Guide)
In the end, it should look like this:
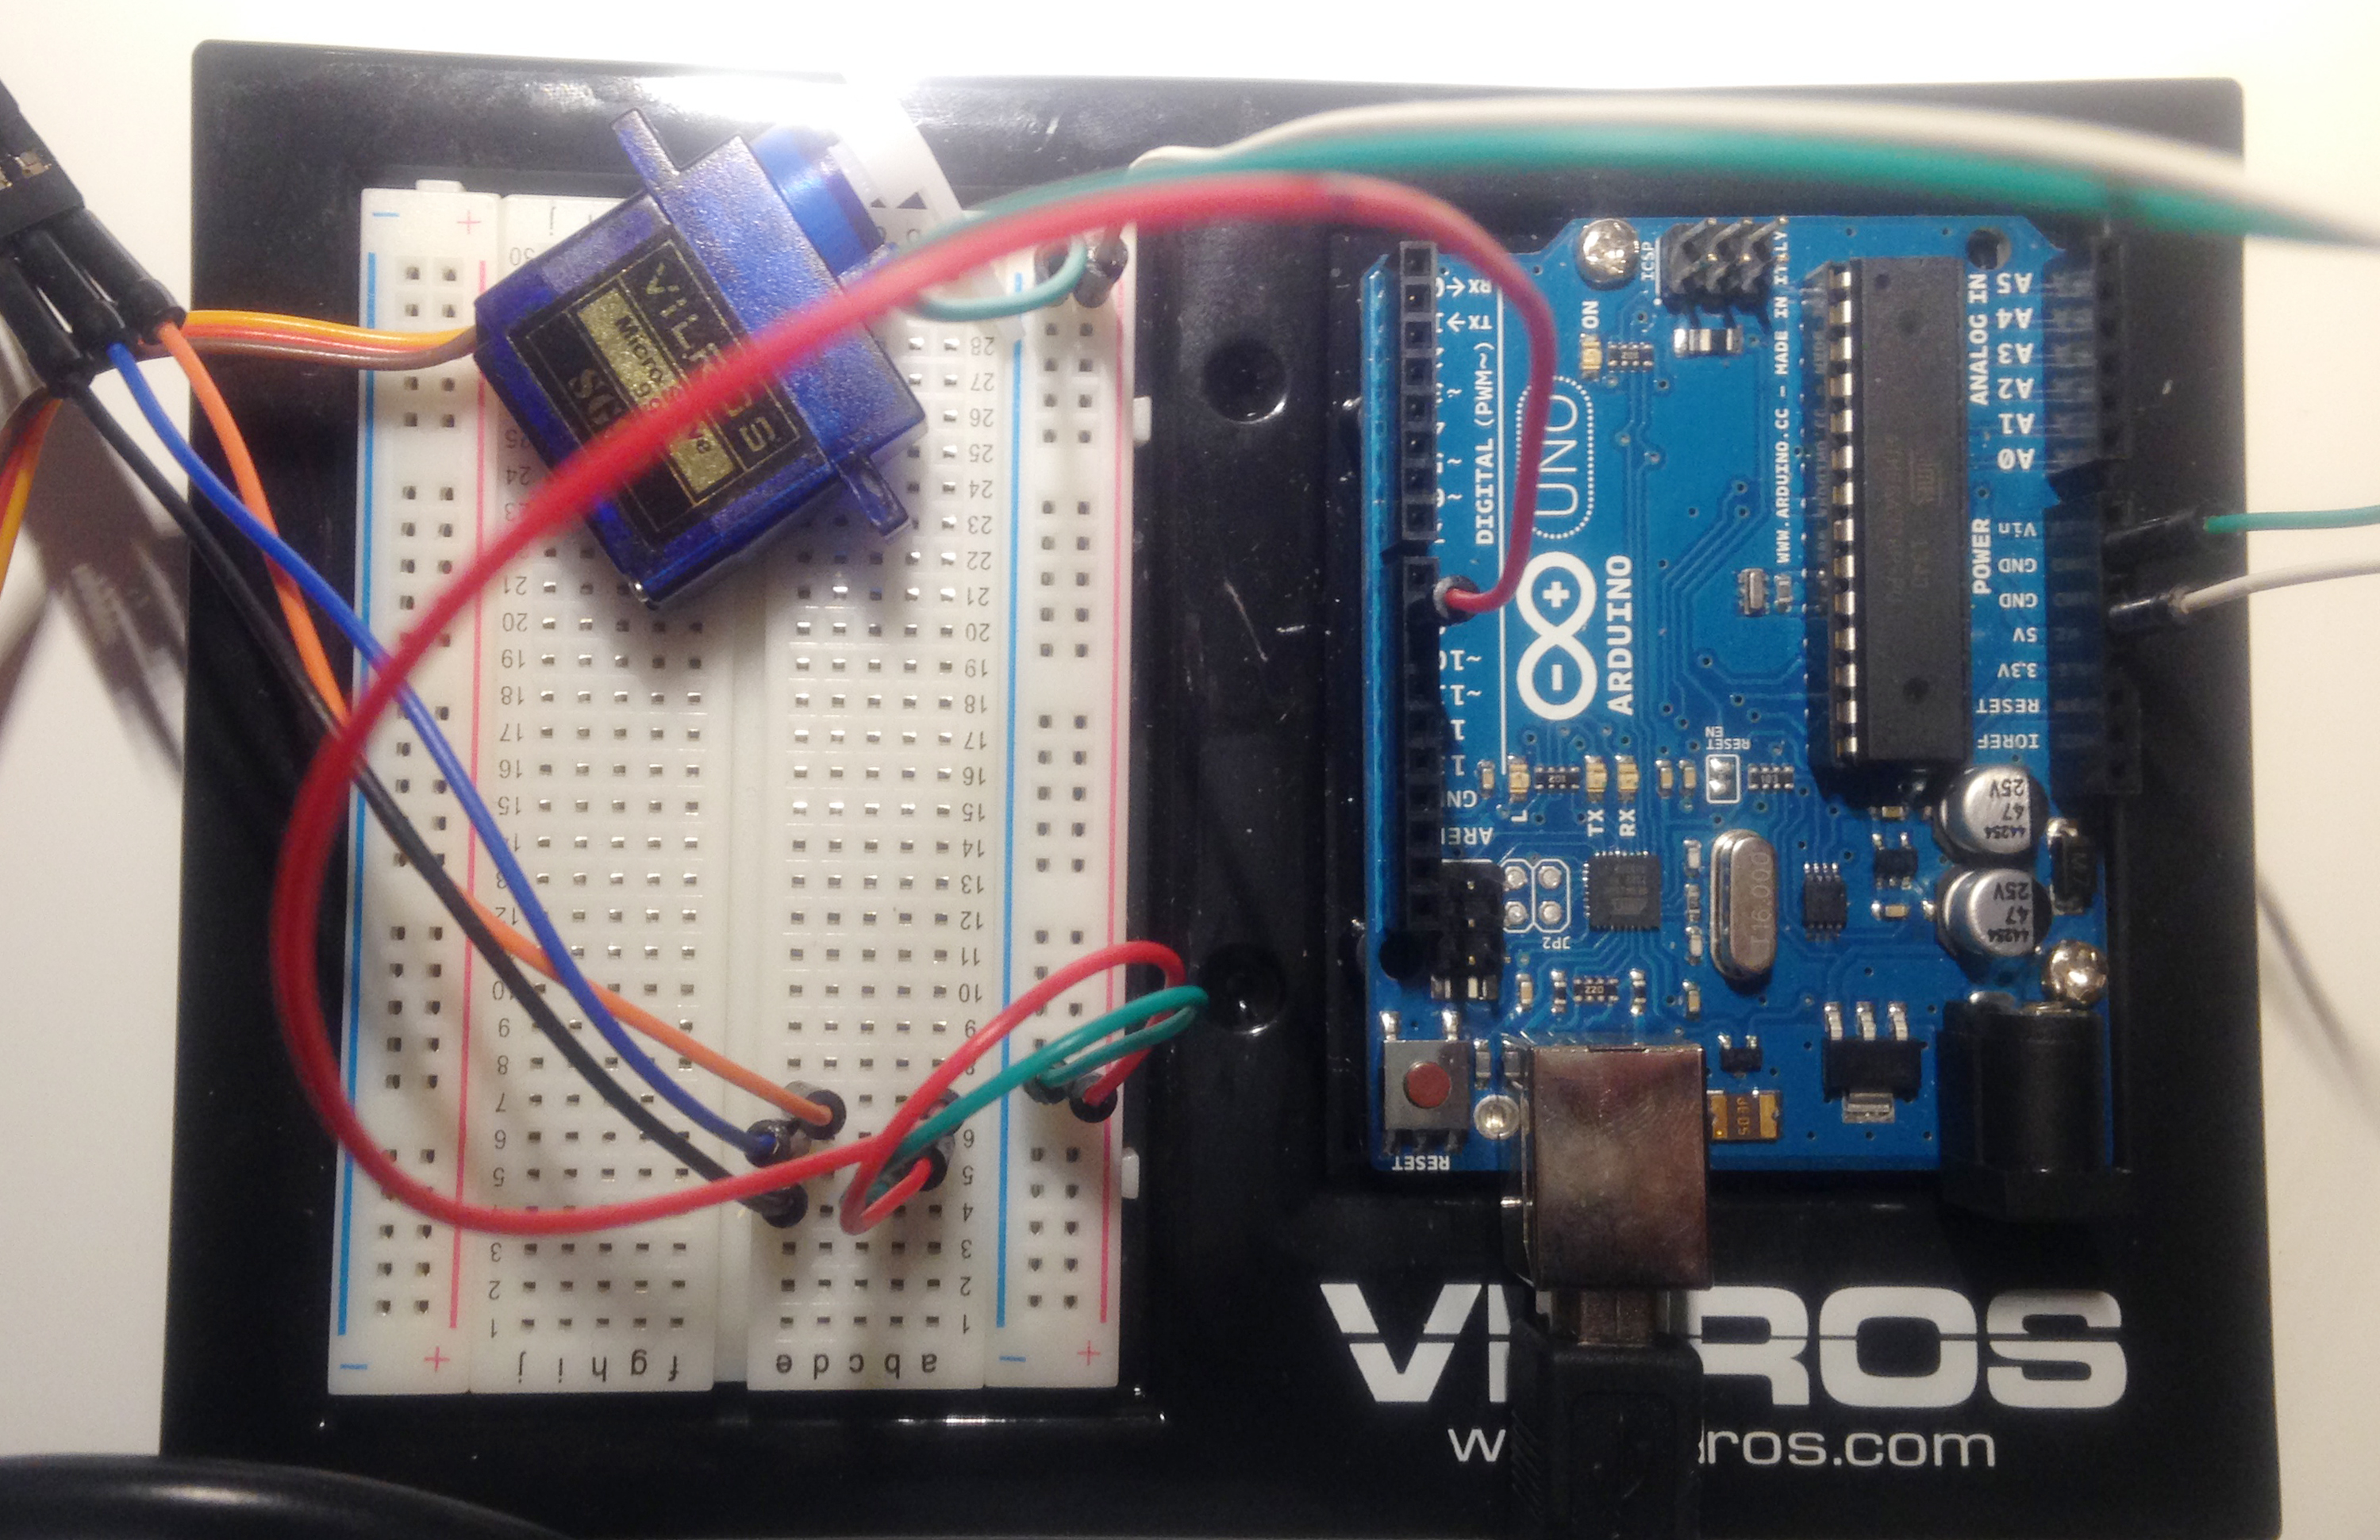
You see, it’s really very simple to connect the servo to the arduino board.
Now, let’s build the communication!
1. Download Processing.
2. Here is a tutorial from Sparkfun to learn how to build the connection between Arduino and Processing .
3. So far we’ve shown that Arduino and Processing can communicate via serial that allows data to flow both ways. Coming after: making our servo rotate.
Power
Connect the red from servo to +5V on arduino.
Ground
Connect black/brown from servo to Gnd on arduino.
Signal
Connect white/orange from servo to pin~9 on arduino.
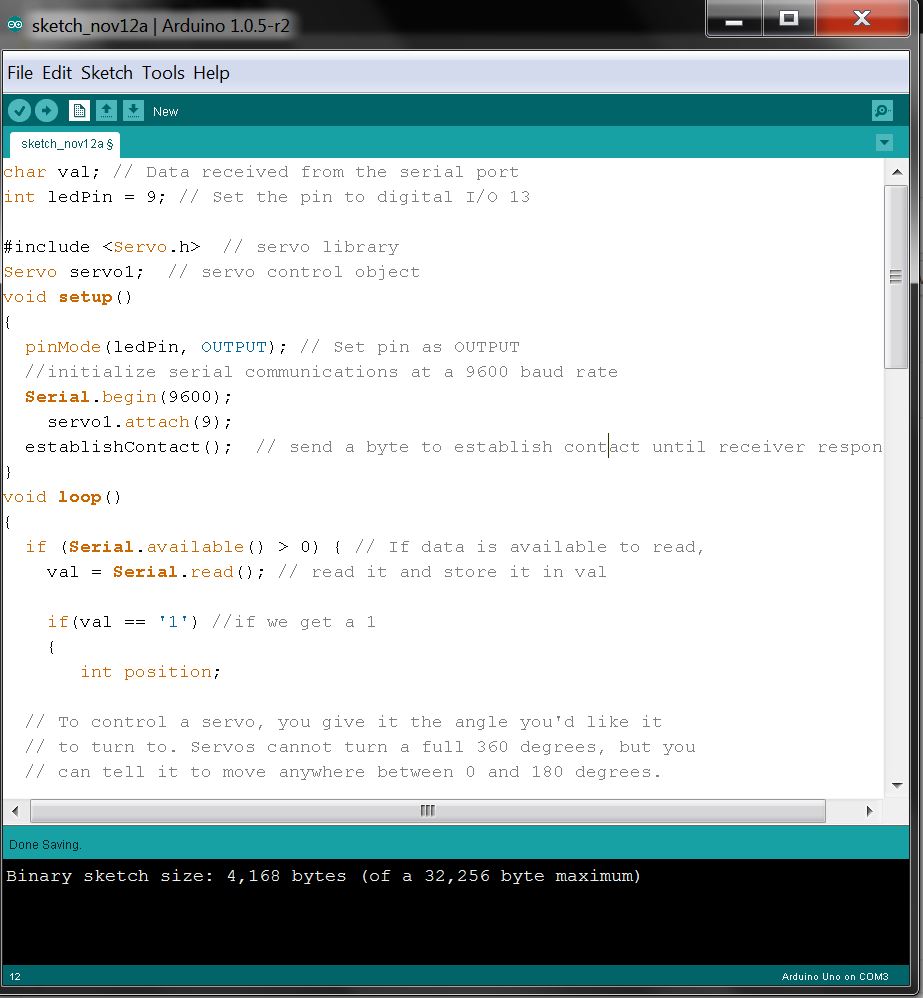
ARDUINO CODE
|
1 2 3 4 5 6 7 8 9 10 11 12 13 14 15 16 17 18 19 20 21 22 23 24 25 26 27 28 29 30 31 32 33 34 35 36 37 38 39 40 41 42 43 44 45 46 47 48 49 50 51 52 53 54 55 56 57 58 59 60 61 62 63 64 65 66 67 68 69 70 71 72 73 74 75 |
//The following code was written with the reference of the online links and example files mentioned below. //https://learn.sparkfun.com/tutorials/connecting-arduino-to-processing // USK Guide Code example files char val; // Data received from the serial port int ledPin = 9; // Set the pin to digital I/O 13 #include // servo library Servo servo1; // servo control object void setup() { pinMode(ledPin, OUTPUT); // Set pin as OUTPUT //initialize serial communications at a 9600 baud rate Serial.begin(9600); servo1.attach(9); establishContact(); // send a byte to establish contact until receiver responds } void loop() { if (Serial.available() > 0) { // If data is available to read, val = Serial.read(); // read it and store it in val if(val == '1') //if we get a 1 { int position; // To control a servo, you give it the angle you'd like it // to turn to. Servos cannot turn a full 360 degrees, but you // can tell it to move anywhere between 0 and 180 degrees. // Change position at full speed: servo1.write(90); // Tell servo to go to 90 degrees delay(1000); // Pause to get it time to move servo1.write(180); // Tell servo to go to 180 degrees delay(1000); // Pause to get it time to move servo1.write(0); // Tell servo to go to 0 degrees delay(1000); // Pause to get it time to move // Change position at a slower speed: // To slow down the servo's motion, we'll use a for() loop // to give it a bunch of intermediate positions, with 20ms // delays between them. You can change the step size to make // the servo slow down or speed up. Note that the servo can't // move faster than its full speed, and you won't be able // to update it any faster than every 20ms. // Tell servo to go to 180 degrees, stepping by two degrees for(position = 0; position < 180; position += 2) { servo1.write(position); // Move to next position delay(20); // Short pause to allow it to move } // Tell servo to go to 0 degrees, stepping by one degree for(position = 180; position >= 0; position -= 1) { servo1.write(position); // Move to next position delay(20); // Short pause to allow it to move } delay(100); } else { Serial.println("Hello, world!"); //send back a hello world delay(50); } } } void establishContact() { while (Serial.available() <= 0) { Serial.println("A"); // send a capital A delay(300); } } |
This is what your code should look like when you’re done:
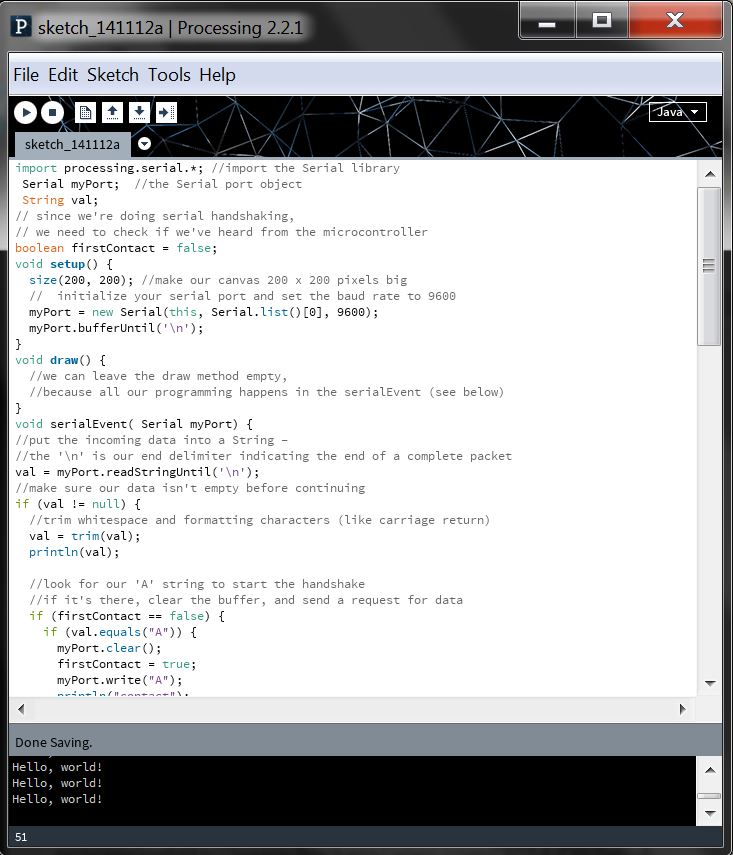
PROCESSING CODE
|
1 2 3 4 5 6 7 8 9 10 11 12 13 14 15 16 17 18 19 20 21 22 23 24 25 26 27 28 29 30 31 32 33 34 35 36 37 38 39 40 41 42 43 44 45 46 47 48 49 50 51 52 53 |
//The following code was written with the reference of the online links and example files mentioned below. //https://learn.sparkfun.com/tutorials/connecting-arduino-to-processing import processing.serial.*; //import the Serial library Serial myPort; //the Serial port object String val; // since we're doing serial handshaking, // we need to check if we've heard from the microcontroller boolean firstContact = false; void setup() { size(200, 200); //make our canvas 200 x 200 pixels big // initialize your serial port and set the baud rate to 9600 myPort = new Serial(this, Serial.list()[0], 9600); myPort.bufferUntil('\n'); } void draw() { //we can leave the draw method empty, //because all our programming happens in the serialEvent (see below) } void serialEvent( Serial myPort) { //put the incoming data into a String - //the '\n' is our end delimiter indicating the end of a complete packet val = myPort.readStringUntil('\n'); //make sure our data isn't empty before continuing if (val != null) { //trim whitespace and formatting characters (like carriage return) val = trim(val); println(val); //look for our 'A' string to start the handshake //if it's there, clear the buffer, and send a request for data if (firstContact == false) { if (val.equals("A")) { myPort.clear(); firstContact = true; myPort.write("A"); println("contact"); } } else { //if we've already established contact, keep getting and parsing data println(val); if (mousePressed == true) { //if we clicked in the window myPort.write('1'); //send a 1 println("1"); } // when you've parsed the data you have, ask for more: myPort.write("A"); } } } |
This is what your code should look like when you’re done:
Reference
https://learn.sparkfun.com/tutorials/connecting-arduino-to-processing
http://www.hackerscapes.com/2014/09/lab-4-communicating/