All posts by Mohammad Momen

Battle Ship at Bus Stops

The purpose of ‘battleship at bus stops’ project was to develop a prototype that could be installed in public spaces to encourage social interaction through the use of games. The bus stop was chosen due to its temporal aspect which draws a number of individuals in one area for a brief period of time thus allowing for the opportunity to develop social interaction between strangers. Battle ship was chosen due to its turn based gameplay which allowed individuals to make their move one at a time.

Arduino_Battleship

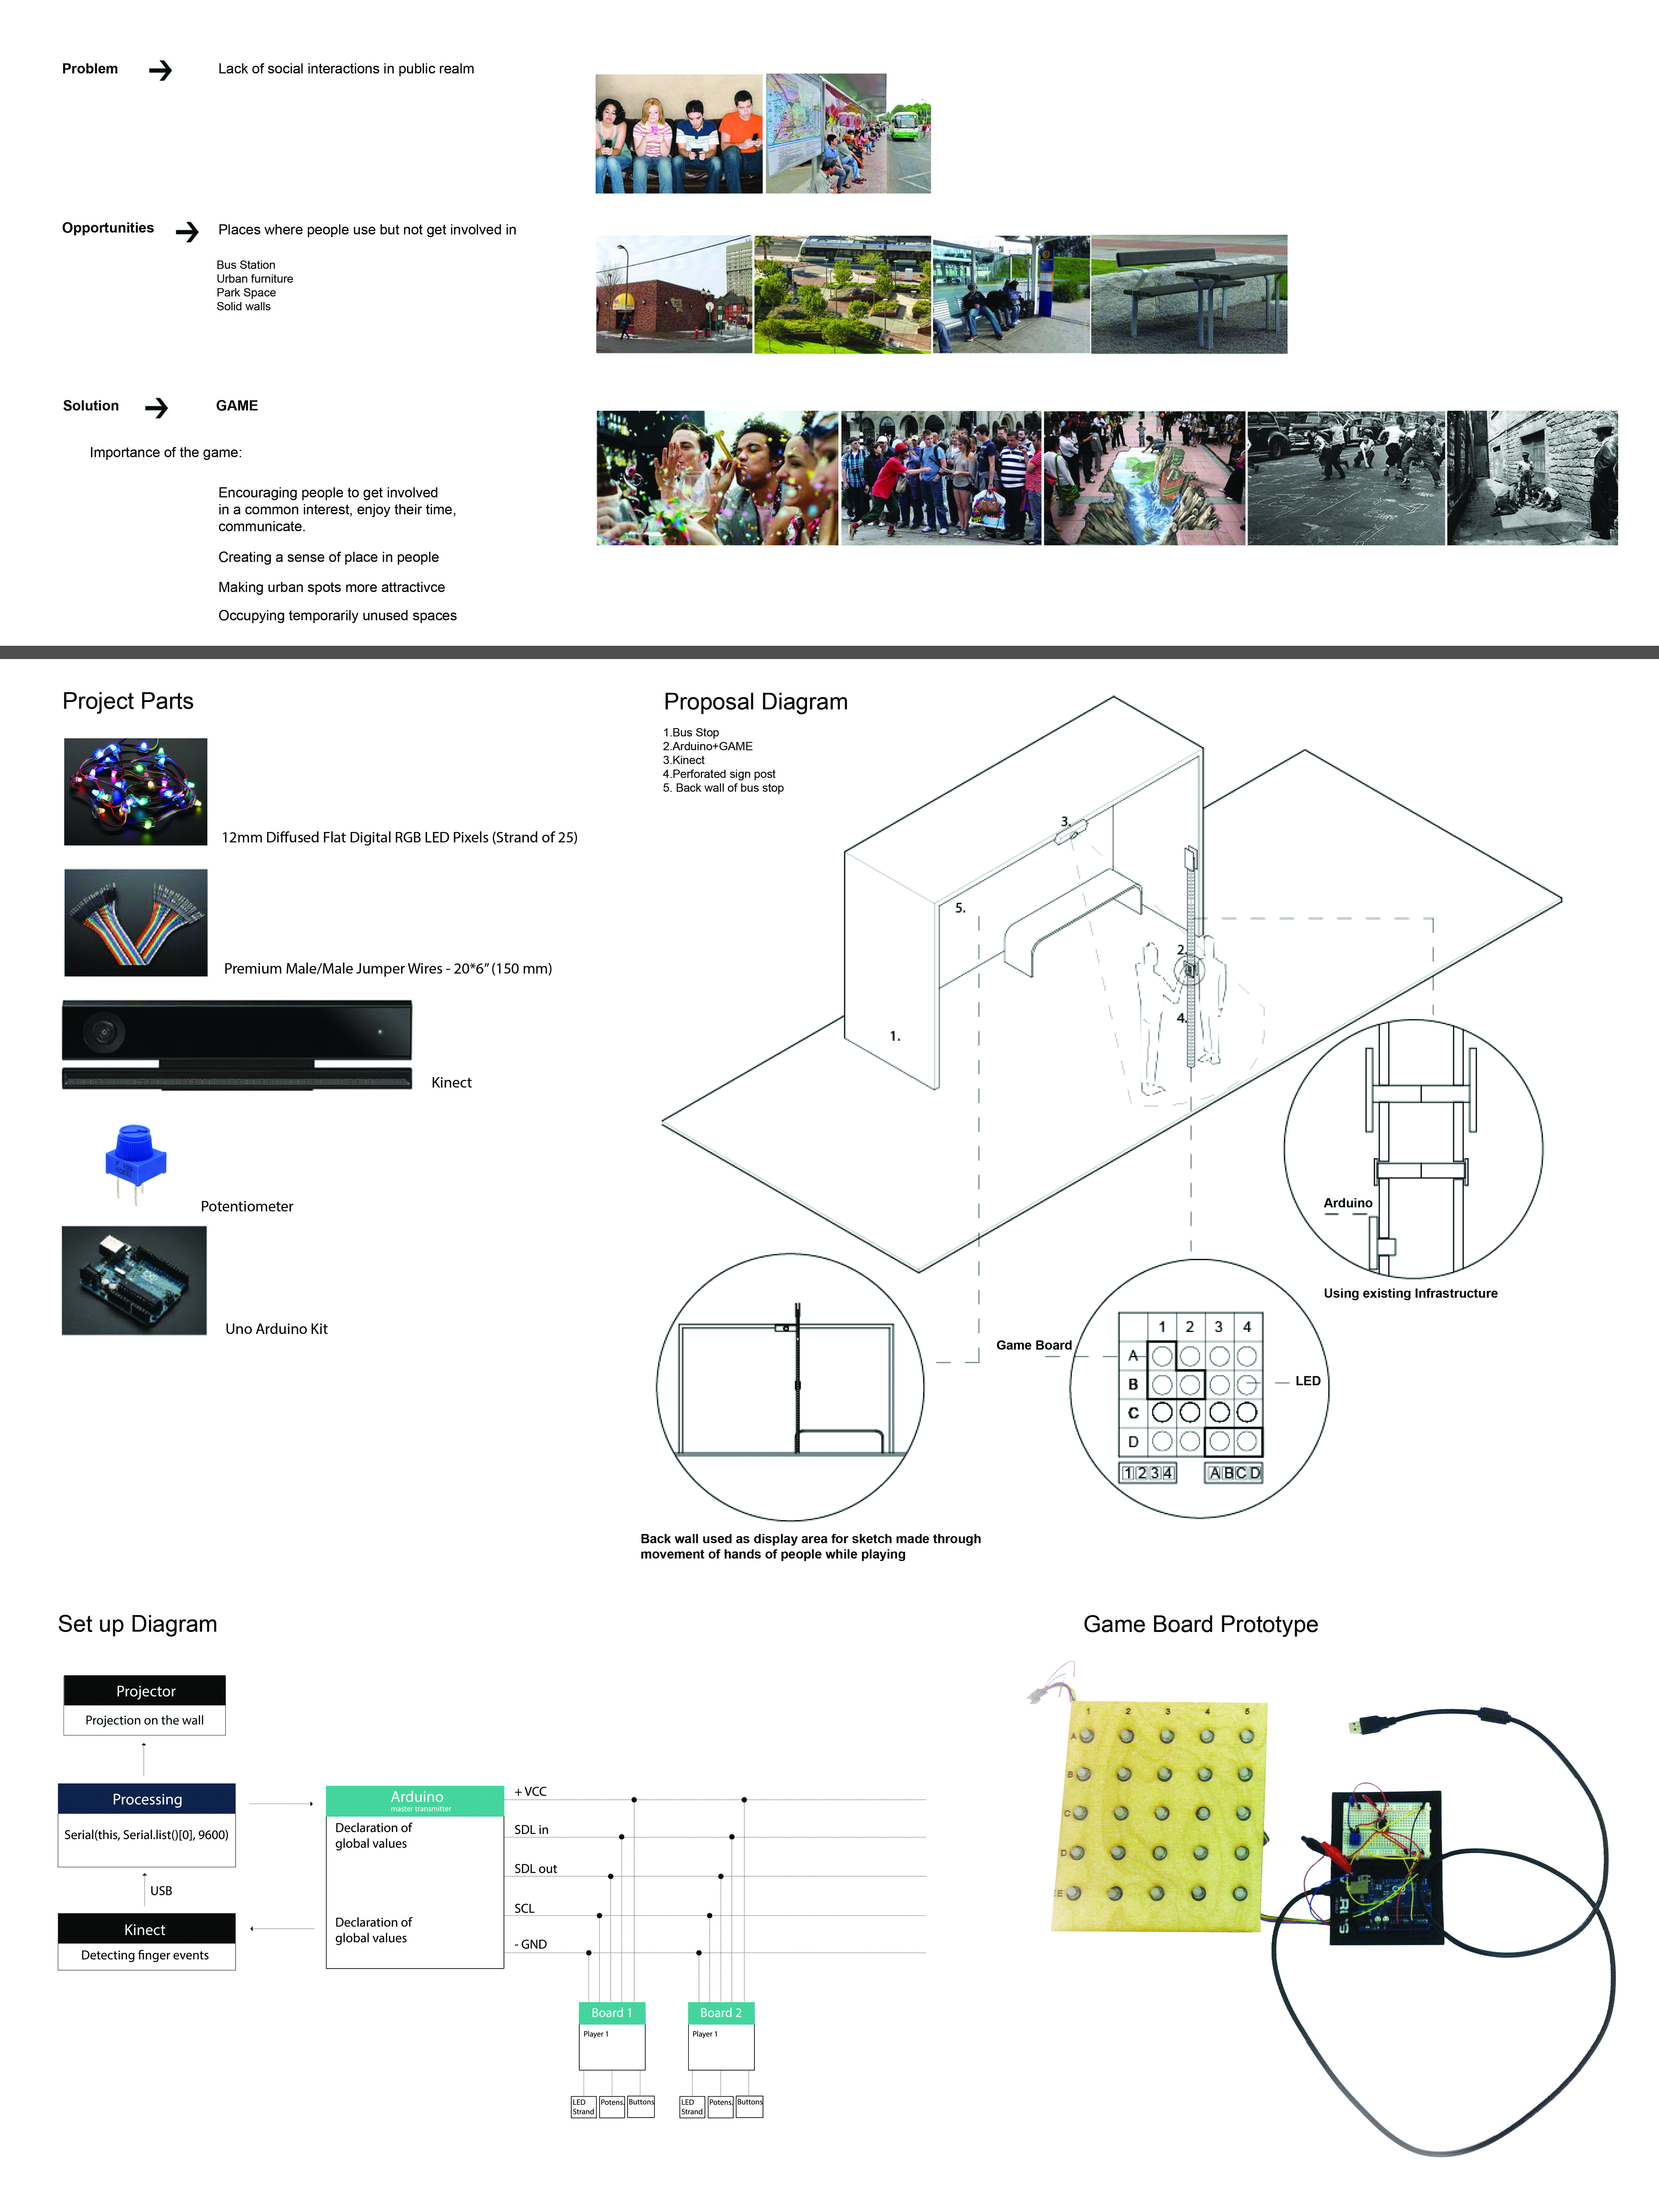
Our project began by attempting to install individual micro controllers known as AT Tiny to light multiple LED’s on the game board but then we discovered that a range of LED’s connected to one wire was already available for purchase online so we decided to go with that instead.
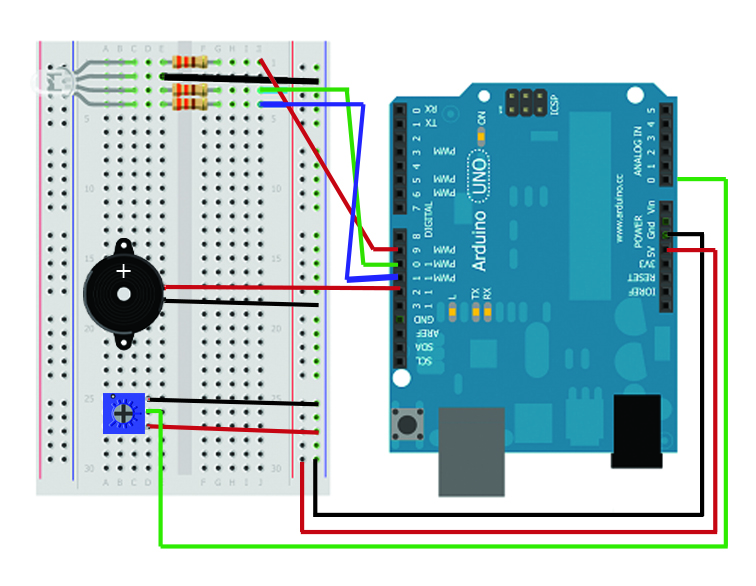
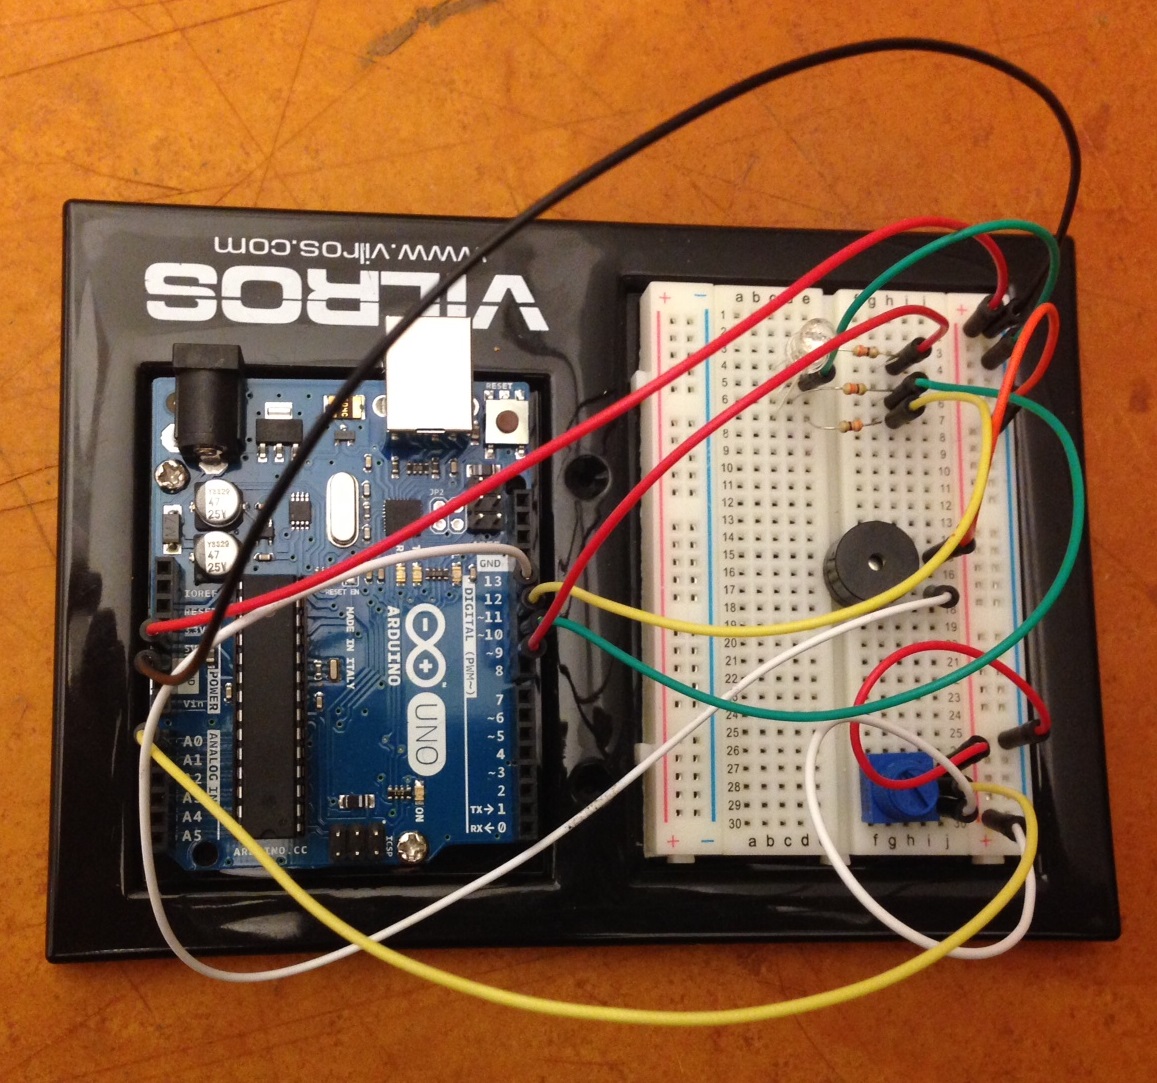
Below is how we attempted to develop a communication with the AT Tiny and the arduino board.

Other components of the project include the Kinect which captures the movement of the players engaged in the battleship game and generates a digital pattern on the back face of the bus stop thus developing public art through the act of social interaction.

This is how we researched how to develop our project through the use of the kinect:

The prototype of the board was developed with the use of the arduino board to develop the circuit and a potentiometer to switch between the LED grid by varying voltage values.

We intend to develop this project further by implementing games in spaces like the bus stop which draw public activity and create opportunities for social interaction.

Team Members:

Eleanna Panagoulia
Mohammad Momenabadi
Namju Lee
Shahzada Mustafa Ahmad

Buzzer Reacts to a Specific RGB LED Color

BUZZER REACT TO A SPECIFIC RGB LED COLOR:

Introduction:
In this tutorial it will be explained that how buzzer reacts to a specific RGB color. For example, it could be an alarm for specific situation, which is defined by colors. That is, as the color of RGB changes, the alarm sound changes and has a specific meaning.
Note: This tutorial only focuses on one color and one sound. Based on, different voltage and different RGB colors, buzzer could be applied for more kinds of notes and sounds.
Parts list:
• Arduino UNO (1)
• Breadboard (1)
• RGB LED (1)
• Jumper wire (11)
• 330 Ohm resistor (3)
• Piezo element (1)
• Potentiometer (1)

How to set up:
The first thing should be done is assembling all parts on the breadboard. Then, start coding.
Note1: Be sure that RGB led legs are connected correctly (in terms of colors and Common leg which is connected to GND without resistor).
Note2: Most LEDs are designed to work with a voltage between 1.5v and 3v. As most microcontrollers (including the Arduino) operate on 5 volts a current limiting resistor is required.
The following diagram shows how to assemble the parts on the breadboard:
instruction

Your final assembly should be something like this:

photo(3)

Code:
Please note that your Arduino must not be connected to the computer. Otherwise, the power might damage or burn out the parts. The code is as follows and next to each part it is explained what each part does.

Now to see the result, plug in your Arduino, upload your code and tern the potentiometer. The result should be like this video:
Video

Many thanks.