In this lab, you are going to work on Processing, then Arduino, and then Processing and Arduino together. Through the lab, you’ll expand your use of capacitive sensors, practice serial communication, and learn more about Processing’s capabilities.
Processing
1. Complete this short Processing Overview.
2. Poke through the tutorials on processing.org. Look for ones that interest you. (If you’re like me, this will probably make you think — “Oh! So this is how so-and-so made that graphic.”)
Arduino
3. If you didn’t finish the Tiny Piano exercise in class, download my code from bSpace under Resources > Lab 6 Code and look it over.
There’s a few choices I made in my code that may be different from your code. For example, I created the function detectCapSense. It’s not really necessary — I just wanted to keep loop() as clean as possible. Also, I chose to store the sensor values in an array. You could store them as integers. It’s just personal style.
I used this code as the starting point for arduino_capsense_controller.ino, which you’ll use in this lab.
4. I made you a game. The code is also available on bSpace under Resources > Lab 6 Code. Please download it, and then set up your Arduino for capacitive sensing, if it’s not already (the same setup you had in class).
5. Upload arduino_capsense_controller.ino onto your Arduino. Run it. Check your serial monitor to make sure that your capacitive sensors are working. When you’re done, close your serial monitor.
Processing + Arduino
6. Now connect Arduino to Processing. To make sure the connection is working correctly, use the exact same sketch that you used in Lab 4 when you printed “Hello World” with Arduino, and then accessed that “Hello World” with Processing. I called this sketch processing_readstring.pde on bSpace.
Run processing_readstring.pde. You should see the same numbers that you saw before on your Arduino serial monitor streaming across the Processing serial monitor.
In the image below you see 0,0. If I were touching one of the sensors, there would be a number in the right or left position. For example, 0,60.
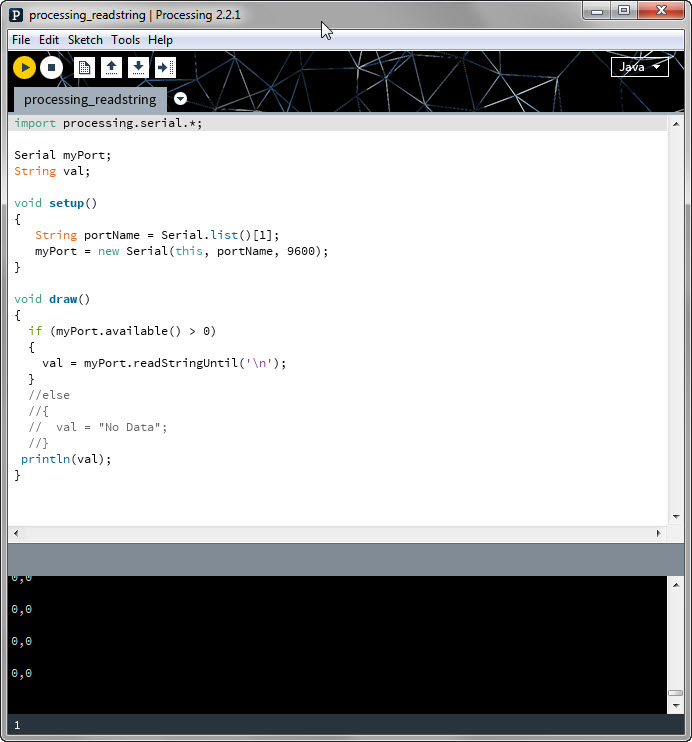
If it’s not working, make sure that you are connected to the correct serial port (this will more than likely be the same one you used in Lab 4). My sketch uses portName = Serial.list()[1] because that is the appropriate port for my computer — update it to work with yours.
7. Now you know that your sensors are working and you are connected to Processing.
Keep your Arduino code going, but stop the previous Processing sketch. Now run processing_capsense_game.pde. Don’t forget to update the port number — look for portName = Serial.list()[1] .
Use your sensors to control the ball. So exciting!
8. Actually, this game is lame. Please make it better.
- Add two more sensors, so you can move the ball up and left, in addition to down and right. (Note that you don’t need alligator clips — you can just touch the end of the wire directly or use a paper clip without plastic coating.)
- Make 4 additional improvements to the Processing side of the game. You pick what they are.
To see how it’s possible to expand the Processing interface quite a bit, you might derive some inspiration from the example of making your own game of Pong available here. This is not exactly pretty, since it’s a replica of a 1970s arcade game, but even so, Pong is popular.
Here’s a fancier example of Pong in action:
In general, there are many, many Processing tutorials available online. There is also example code included with the Processing IDE under File > Examples. These examples are pretty fun. They’re also almost entirely self-contained, so you just need to open one, hit Run, and then watch it do its thing.
9. Please upload to bSpace:
- A paragraph or two explaining what changes you made to the game. (4 points)
- Your updated Arduino and Processing code. (8 points)
- A video showing your revised game in action. (8 points)