You are going to write a tutorial for this blog on how to do one, little piece of your project. By writing the tutorial, you’ll not only get to know that piece well, you’ll also give back to the Arduino community.
1. With the support of your group, choose one aspect of your project to focus on. Be specific. For example, it’s better to learn how to make a force-sensitive paver (a project need that one group discussed in class), than how to generally use a force sensor.
2. Figure out how to make the code and the circuitry work. Find existing tutorials and fiddle around. If you get stuck, turn to your group members.
The Arduino Playground has links to many, many tutorials. There are also many on Instructables — some are easier to understand than others. What makes for a good tutorial?
3. Write your own tutorial. It must include a parts list, a circuit diagram, code, and any other information you need to make the tutorial as clear as possible (e.g., images, or a brief video).
As you write, think of your fellow classmates: would they understand how to follow your tutorial? Read the Arduino Style Guide for tips on writing tutorials.
4. Post your tutorial on this blog.
- Find the email with your user name and password (I sent it to you on 10/27 and should have the subject “[HACKERSCAPES] Your username and password”). You have permission to write and edit posts. You can also delete your unpublished posts. If you need to delete a published post, let me know. (FYI – You can’t view your classmate’s posts that are in draft, and they can’t see yours.)
- Use the link in the email to log in.
- Once you’re logged in, click the link on the left side bar for Posts and choose “Add New.”
- Give your post a clear title.
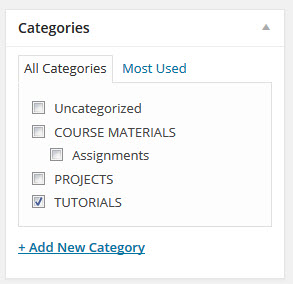
- Categorize your post by checking the Tutorials box on the right of the screen.
- To include any images in your tutorial, use the “Add Media” button, located underneath the title of the post.
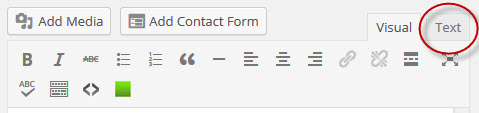
- Make your code nice and readable. To to this, you have to wrap the code in an html tag for pre-formatted text, called a pre tag. First, choose the Text tab (see image below).
- Once you’re on the Text editor side, copy and paste in your Arduino code into WordPress. On the line before the code starts write: <pre lang=”arduino”>. On the line after the code ends, write: </pre>. If you do this on the Visual editor side, the tags won’t work.
- Before you publish your draft, you can Preview it to make sure everything looks right. This is a good chance to check that your pre tags are working as planned and look for typos.
- When you’re ready, hit Publish.
- Feel free to correct any little things after you publish. If you ever make any more significant updates, it’s good to add a note (like I did at the bottom of Lab 3).