Using Piezo Sensors to
Detect Vibration
In this tutorial, you will learn how to use a Piezo sensor to detect vibration. We intend to use this function as
part of a larger project involving the use of sensors in public spaces to turn on background music and trigger
pre-recorded sounds when people pass through the space. To keep things simple, however, this tutorial will
stick to the simpler concept of the film sensor perceiving vibration.
INGREDIENTS:
• Arduino UNO
• Solderable breadboard
• (1) LM358 OpAmp
Integrated Circuit
• (1) Piezo sensors
• (1) Potentiometers
• (1) 1 mega-ohm resistor
• (1) Zener 5.1V 1 Watt diode
• (1) 0.1 uF capacitor
• Jumper wires
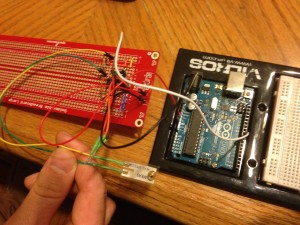
The first step is to put your circuit together.
The image below shows the completed circuit using a solderable breadboard.
In the bottom left of the image the green and yellow wires are coming from the piezo element. The yellow is
the ground, the green is the positive output. A resistor is used for the component. To prevent voltage spikes,
a diode is added in parallel to protect other parts of the circuit.
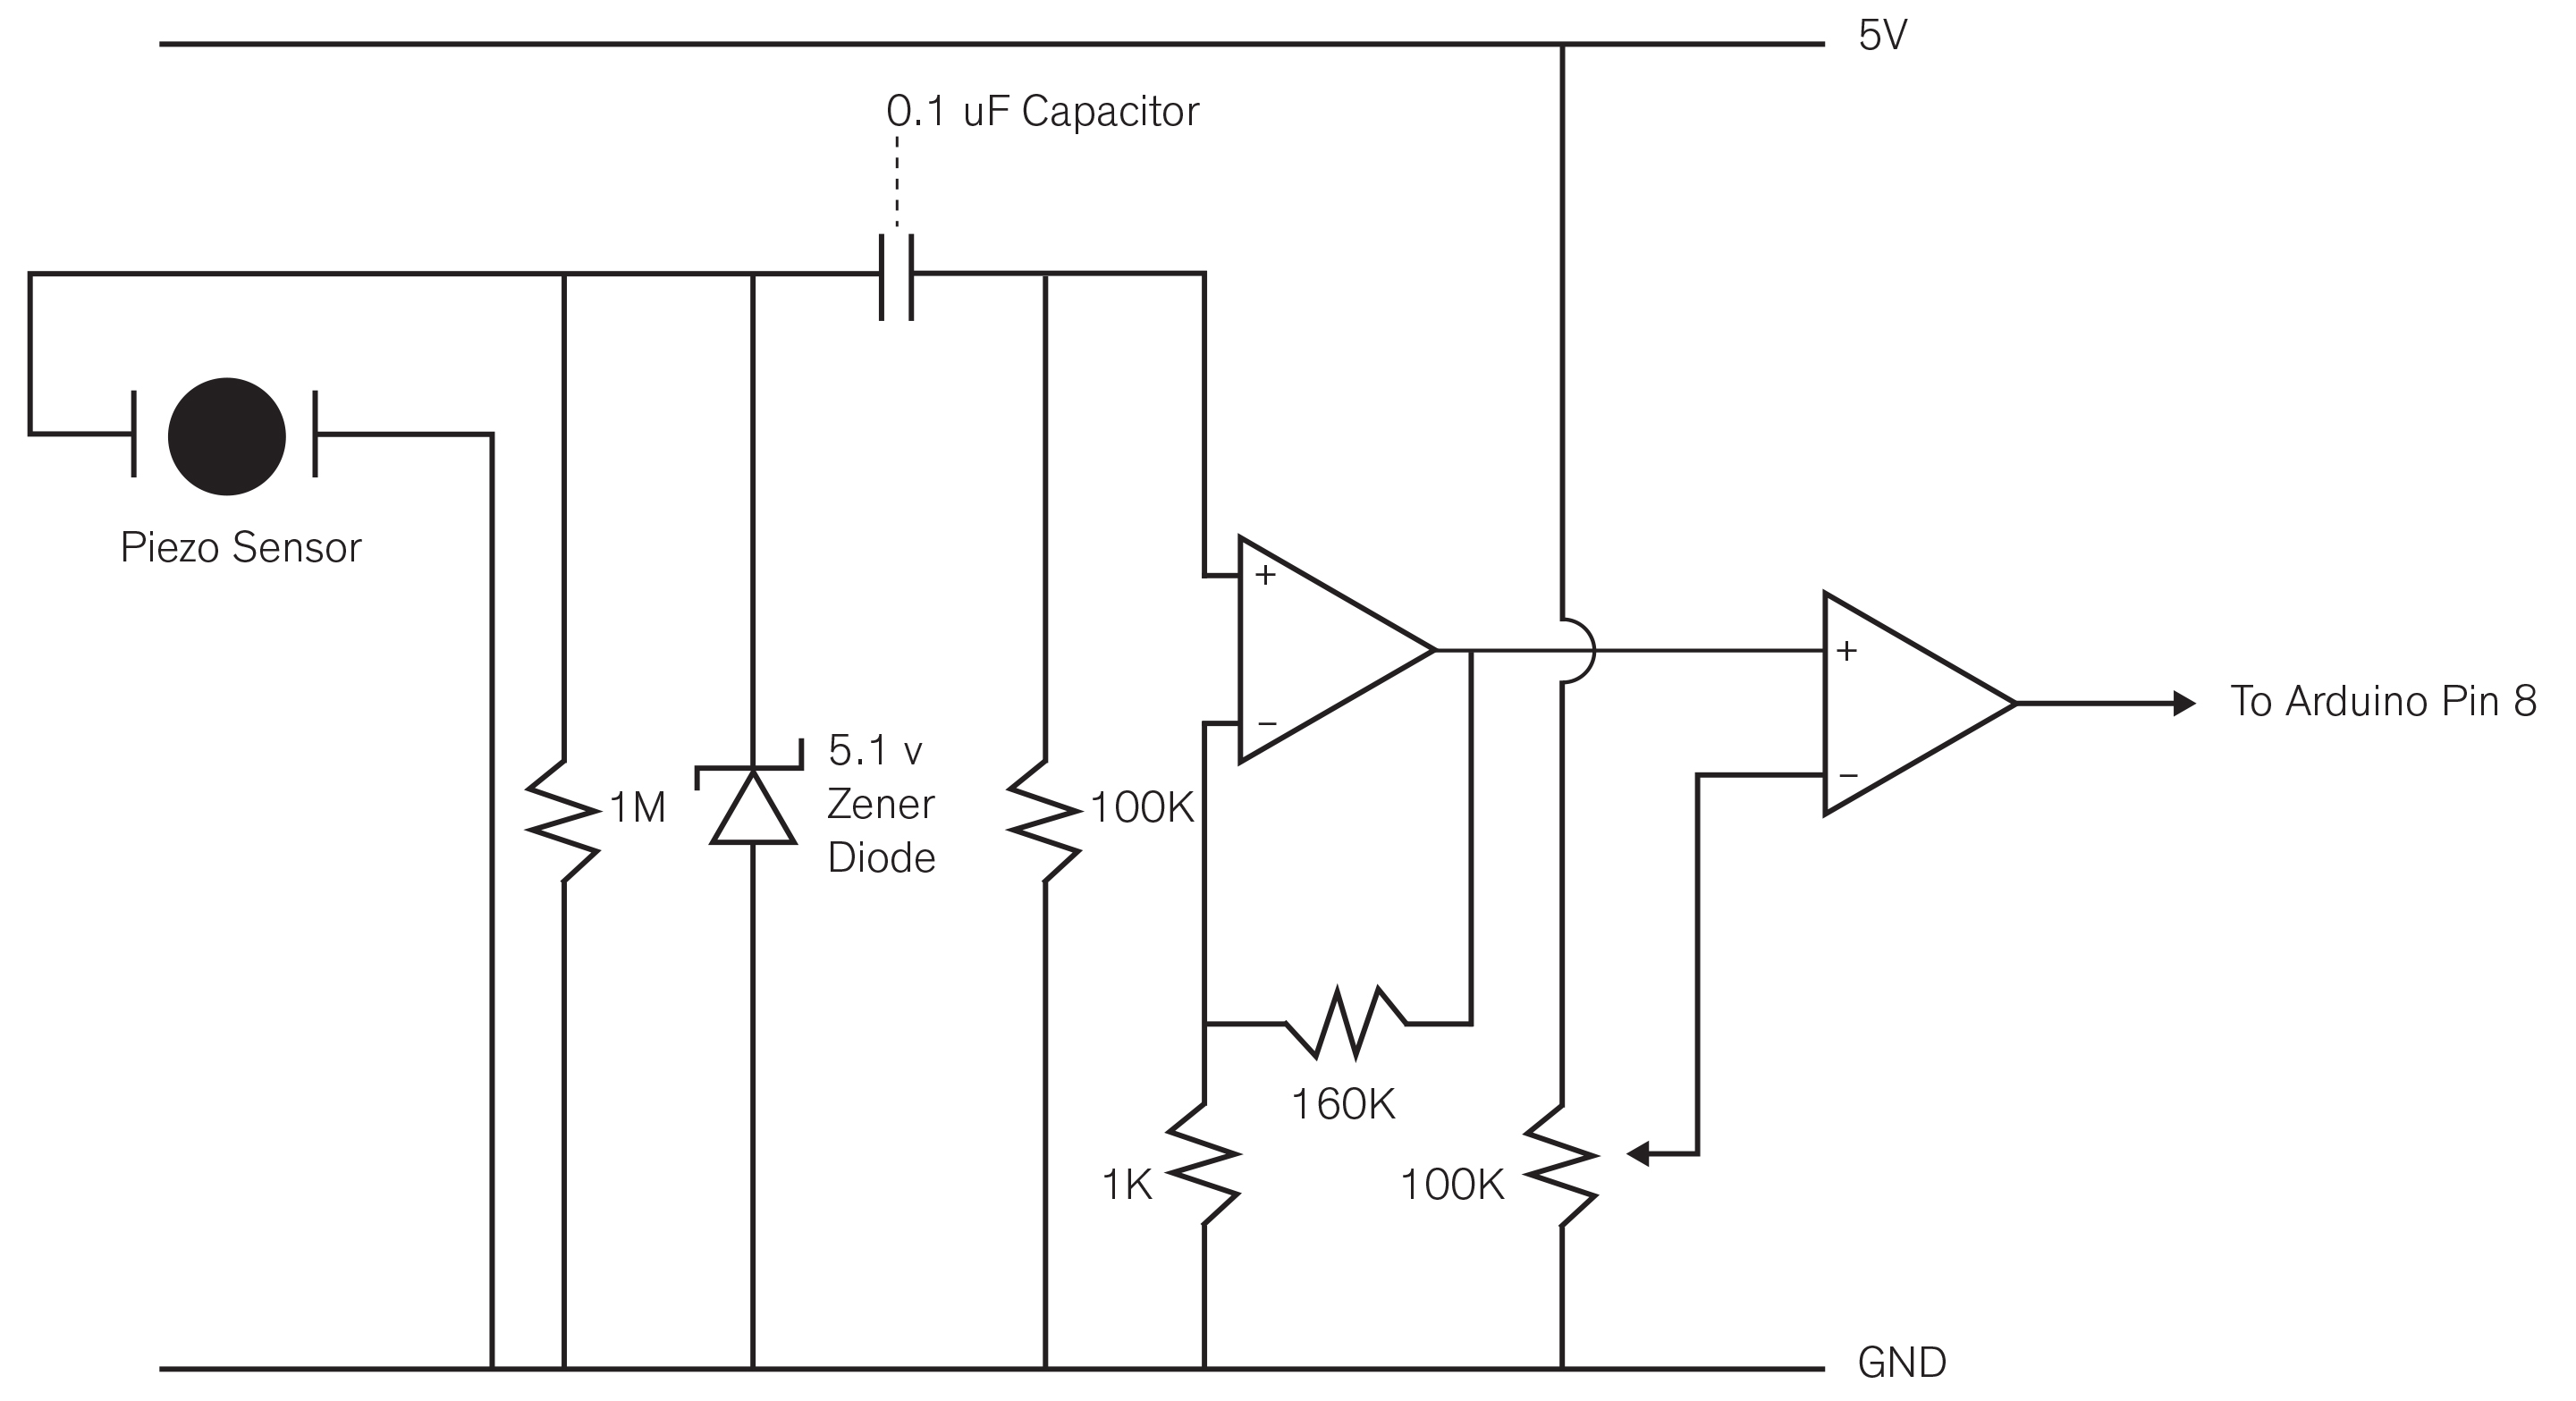
The signal is taken into the op amp. The op amp amplifies the signal from the piezo element, and sends
that signal from one side of the op amp to the other. The right side of the op amp receives the signal, and is
used for amplification of the signal. The left side gets the amplified signal from the right side, and is used for
a comparator, determining which values to designate as high or low. The potentiometer adjusts the sensitivity
of the comparator, and thus the sensitivity of the trigger.
The output of the comparator provides the input for the arduino. Using our code, this input determines the
display in the serial monitor, either “EARTHQUAKE” when motion is detected, (a HIGH reading) or “CHILLIN”
when motion is not detected (a LOW reading).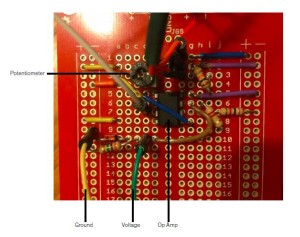
This diagram illustrates the flow of the signal through the circuit:
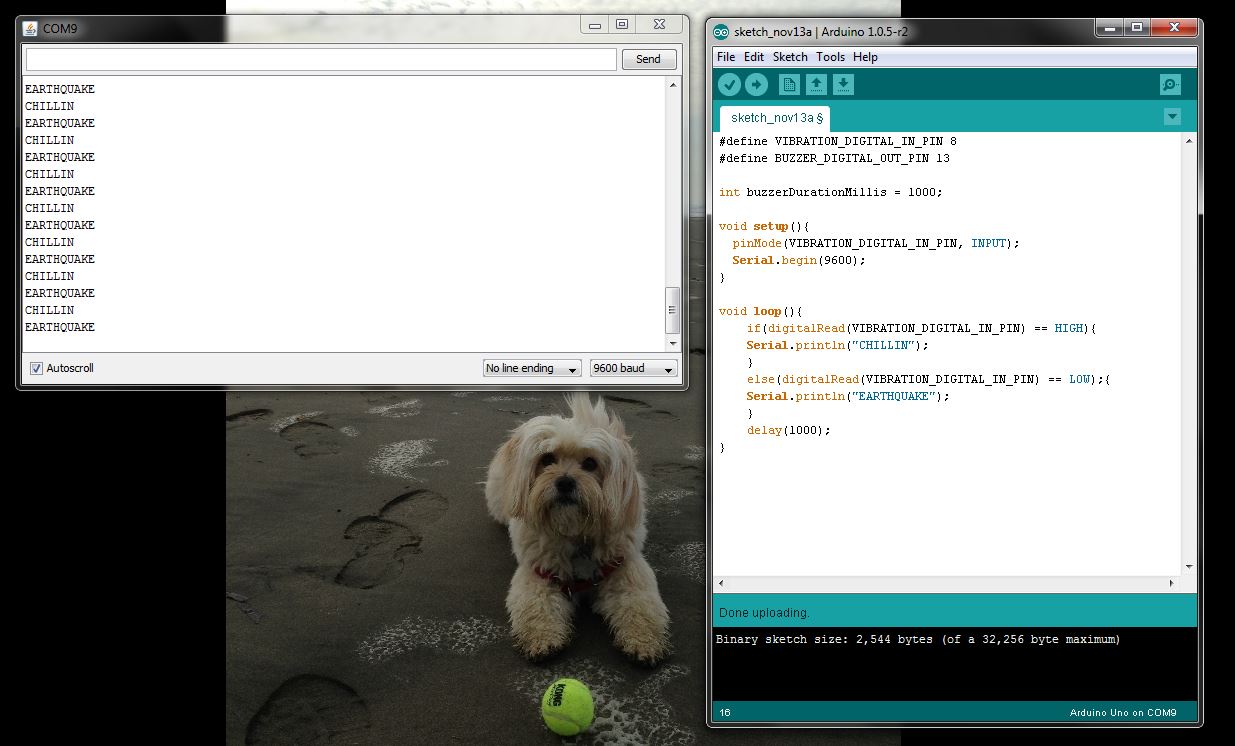
The completed code and serial monitor display look like this:
|
1 2 3 4 5 6 7 8 9 10 11 12 13 14 15 16 17 18 19 |
#define VIBRATION_DIGITAL_IN_PIN 8 #define BUZZER_DIGITAL_OUT_PIN 13 int buzzerDurationMillis = 1000; void setup(){ pinMode(VIBRATION_DIGITAL_IN_PIN, INPUT); Serial.begin(9600); } void loop(){ if(digitalRead(VIBRATION_DIGITAL_IN_PIN) == HIGH){ Serial.println("CHILLIN"); } else(digitalRead(VIBRATION_DIGITAL_IN_PIN) == LOW);{ Serial.println("EARTHQUAKE"); } delay(1000); } |